
How to Remove Pen Marks from a Leather Sofa
Step-by-step guide to safely remove ink from finished, aniline, nubuck, or faux leather test first, start gentle, and condition afterward.
SOFA CARE AND MAINTENANCE
Western Ranch Interiors
7/27/20266 min read
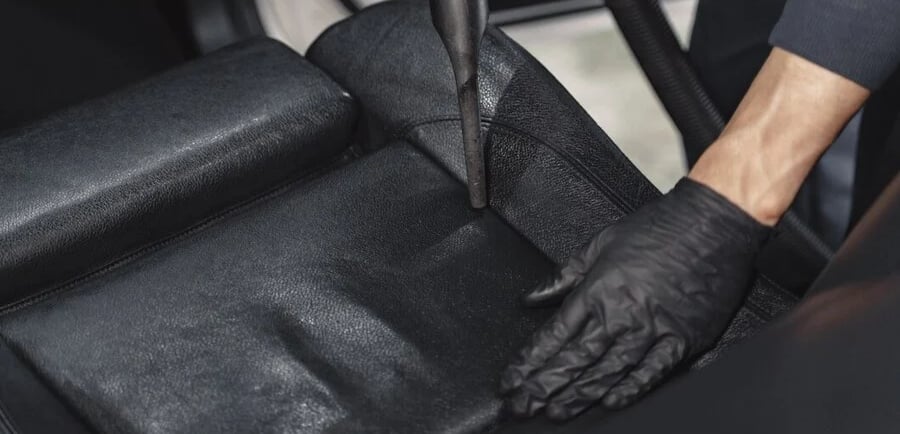
There's a particular kind of dread that comes with spotting a fresh ink streak across your leather sofa. Maybe a pen rolled out of a kid's backpack, or a guest set down a ballpoint that leaked mid-conversation. Either way, the panic is real leather feels expensive and fragile, and the instinct to scrub hard can do more damage than the stain itself.
The good news is that pen marks on leather are almost always fixable, especially if you catch them early. The key is knowing what your sofa is actually made of, using the right products in the right order, and resisting the urge to attack the stain with whatever's under the kitchen sink.
This guide walks through exactly how to do that safely, methodically, and without turning a small ink smudge into a bleached patch or a cracked finish.
Why Pen Marks Are Trickier Than Other Stains
Ink is designed to bond quickly and pesurfaces;rmanently to surfaces that's its entire job. On paper, that's a feature. On leather, it's a problem, because the dye in most pens contains solvents that can penetrate the leather's surface coating within minutes.
A few things make ink removal from leather uniquely tricky:
Leather isn't one material. Finished, unfinished, aniline, and bonded leather all react differently to cleaning agents, so a method that's safe on one type can permanently damage another.
Ink sets fast. The longer it sits, the deeper it soaks into the surface pores, especially on unfinished or aniline leather.
Aggressive cleaning spreads the stain. Rubbing too hard, or using too much liquid, can push ink outward instead of lifting it out, turning a small dot into a larger blotch.
Some "quick fixes" cause secondary damage. Nail polish remover, bleach, and hairspray are frequently recommended online, but they can strip color, dry out the leather, or leave a dull patch that's arguably worse than the original mark.
Understanding this upfront changes how you approach the whole process. It's not about finding the strongest cleaner; it's about finding the gentlest one that actually works and testing before you commit.
Step 1: Identify Your Leather Type First
Before touching any cleaning product to the stain, figure out what kind of leather you're dealing with. This single step prevents most of the accidental damage people cause when treating ink stains.
Finished (protected) leather has a polymer topcoat and is the most common type in furniture. It's fairly resistant to liquids and is the most forgiving to clean.
Aniline leather is dyed without a protective topcoat, so it's soft and natural-looking, but highly absorbent ink can soak in fast.
Nubuck or suede-like leather has a napped surface and is extremely porous; it requires specialized care and is the easiest to damage with liquid cleaners.
Bonded or faux leather is made from reconstituted leather fibers or synthetic material and often reacts more like plastic than genuine hide.
If you're not sure which type you have, check the manufacturer's tag, care booklet, or receipt, or do a small water-drop test on a hidden area. If the water beads up, you likely have a protected/finished leather; if it soaks in immediately, it's more porous and needs a gentler approach.
Step 2: Always Test in a Hidden Spot First
This step gets skipped constantly, and it's the one that saves sofas. Pick a spot that's out of sight, like the back panel, underside, or a rear corner, and apply a small amount of your chosen cleaning solution there.
Wait a few minutes and check for:
Discoloration or fading
Changes in texture (stiffness, tackiness, or roughness)
Any spreading or smearing of dye from the leather itself
If the hidden spot looks unaffected, you're clear to move to the actual stain. If it reacts at all, stop and try a different method better to lose a few minutes than a sofa's finish.
Step 3: The Safest First-Line Method — Mild Soap and Water
For finished, protected leather (the type most sofas use), start with the gentlest option available before reaching for anything stronger.
Mix a few drops of mild dish soap or saddle soap into a small bowl of lukewarm water.
Dampen a soft microfiber cloth not soaking wet, just slightly moist.
Dab gently at the ink mark using small circular motions, working from the outside of the stain inward.
Avoid pressing hard; let the cloth lift the ink rather than forcing it out.
Wipe away residue with a second, clean damp cloth, then dry immediately with a dry towel.
This method resolves a surprising number of fresh, surface-level ink marks, particularly on protected leather where the ink hasn't had time to penetrate.
Step 4: For Stubborn Marks — Rubbing Alcohol (With Caution)
If soap and water doesn't budge the mark, isopropyl rubbing alcohol is the next step up but it needs to be used carefully, since alcohol can strip color from unprotected or aniline leather.
Pour a small amount of rubbing alcohol onto a cotton swab or the corner of a soft cloth — never directly onto the sofa.
Dab, don't rub, directly on the ink mark. Dabbing lifts the stain; rubbing spreads it.
Change to a clean part of the cloth frequently so you're not reapplying lifted ink back onto the leather.
Once the mark fades, immediately wipe the area with a clean, slightly damp cloth to remove alcohol residue.
Follow with a leather conditioner, since alcohol can dry out the surface if left untreated.
This step works well for many ballpoint ink stains because alcohol breaks down the ink's pigment without needing heavy scrubbing.
Step 5: For Fresh Marks — Non-Acetone Nail Polish Remover (Use Sparingly)
Non-acetone nail polish remover is sometimes recommended for ink stains, and it can work on tougher, set-in marks — but it's a stronger solvent, so it should be a later option, not a first attempt, and should never be used on aniline or unfinished leather.
Apply a very small amount to a cotton swab.
Test on a hidden area first, without exception.
Dab lightly on the stain, working in small sections.
Wipe clean with a damp cloth immediately after the ink lifts.
Condition the leather afterward to restore moisture balance.
Acetone-based removers should be avoided entirely, since they're more likely to strip finish and dull the leather's sheen.
Step 6: Specialty Leather Ink Removers
If home remedies aren't cutting it, commercial leather ink-removal products are formulated specifically for this problem and tend to be gentler on the material overall than repurposed household items.
Look for products labeled specifically for "leather ink stain removal," not general upholstery cleaners.
Follow the manufacturer's instructions exactly, including dwell time and wipe-off method.
Always test on a hidden patch first, even with purpose-made products.
Pair with a matching leather conditioner from the same brand line when possible, since formulations are often designed to work together.
These products are worth the investment if you're dealing with a valuable or antique piece, since they're built to minimize the risk of finish damage.
What to Avoid Entirely
A few "hacks" circulate widely online but tend to cause more harm than good on leather specifically:
Bleach or bleach-based wipes — these will discolor and weaken leather fibers.
Melamine (magic) erasers — these are mildly abrasive and can wear through the leather's finish layer.
Hairspray — a popular old trick for fabric, but it can leave a sticky residue and dull leather's natural sheen.
Excessive water or soaking — leather is not meant to get wet for extended periods; it can warp, stiffen, or crack as it dries.
Hard scrubbing with rough sponges or brushes this can create micro-scratches that trap dirt and make future stains worse.
If a mark doesn't respond to gentle methods, it's better to consult a professional leather cleaner than to escalate to harsher chemicals on your own.
Aftercare: Conditioning the Leather
Any cleaning process even mild soap and water pulls some natural oils out of leather. Skipping aftercare is how sofas end up looking dry, cracked, or unevenly worn over time.
Apply a leather conditioner formulated for furniture (not automotive or shoe products) a few hours after cleaning, once the area is fully dry.
Work it in with a soft, clean cloth in gentle circular motions.
Let it absorb for the time specified on the product label before sitting on or touching the area.
Repeat conditioning every few months as part of general leather maintenance, not just after a stain.
This step restores flexibility and sheen, and it also helps blend the treated area back in with the rest of the sofa so there's no visible "clean spot."
When to Call a Professional
Some situations are genuinely better left to upholstery specialists:
The leather is aniline, nubuck, or another highly porous, unprotected type.
The stain is old, set-in, or covers a large area.
The sofa is expensive, antique, or under warranty (DIY cleaning can void warranty terms).
Previous attempts at removal have already changed the color or texture of the leather.
Professional leather cleaners have access to solvents and techniques that aren't practical or safe for home use, and they can usually assess in person whether a stain is salvageable.
Preventing Future Pen Marks
A little prevention goes a long way with leather furniture:
Keep pens capped when not in use, especially in households with kids or frequent guests.
Store loose pens in a tray, drawer, or bag pocket rather than directly on cushions.
Consider a leather protectant spray, which creates a slight barrier against spills and marks.
Address any new mark immediately the single biggest factor in successful ink removal is how quickly you respond.
Final Thoughts
Pen marks on a leather sofa look alarming, but they're rarely a lost cause. The real risk isn't the ink itself; it's rushing in with the wrong product before understanding what kind of leather you're working with. Start gentle, test everything on a hidden spot, escalate only as needed, and finish with conditioning to keep the leather looking consistent.
Handled carefully, most ink stains lift out cleanly, and your sofa gets to keep its story without a permanent souvenir.
Western Ranch Interiors
Heirloom furnishings built for architectural ranch living.
Home-Shop-Reviews-Contact
Trade & Support
concierge@westernranchinteriors.com
Trade Program & Custom Commissions
Bozeman, Montana
© 2026 Western Ranch Interiors-Sourced directly from master blacksmiths, leatherworkers, and timber craftsmen across North America.
HAND-FORGED - HEIRLOOM QUALITY